Flashing OpenTX to FlySky TH9x with AVRDUDE
DISCLAIMER
I don't take any responsibility about damage your control. Flash under your own risk! If you're following this guide step by step, your don't have any problem later. If your main board (th9x) bricked (It's very hard that happends), you don't need buy other one. Not, don't need sell your control by spare parts. TH9x main board is very generic and some little cheap, you can buy one on Banggood or AliExpress.

Before starts you need know something's...
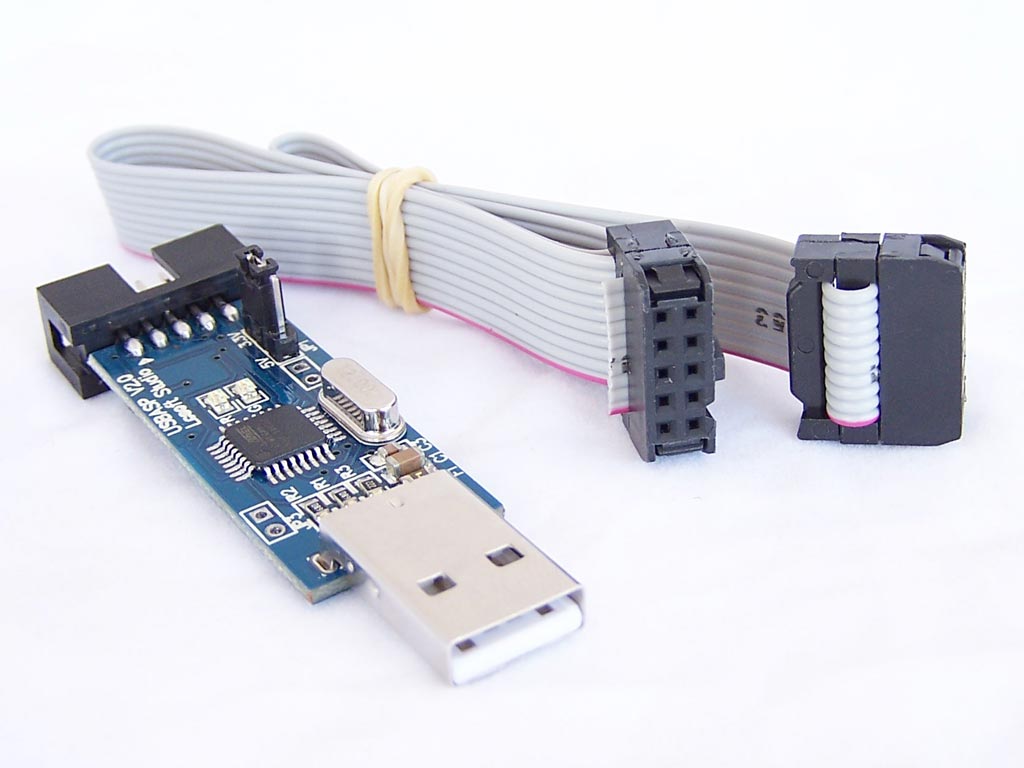
You need an AVR programmer for flashing OpenTX hex (firmware). You can use a USBasp, or an Arduino as AVRisp (follow this Arduino official guide). This guide is based on USBasp, but, teorycally it's the same way with Arduino as ISP.
Let's starts...
First to all, we need open FlySky TH9x to access main board and connect the USBasp. Unscrew and open it. I recommend umount the main board from case, that's way is more easily work on it.
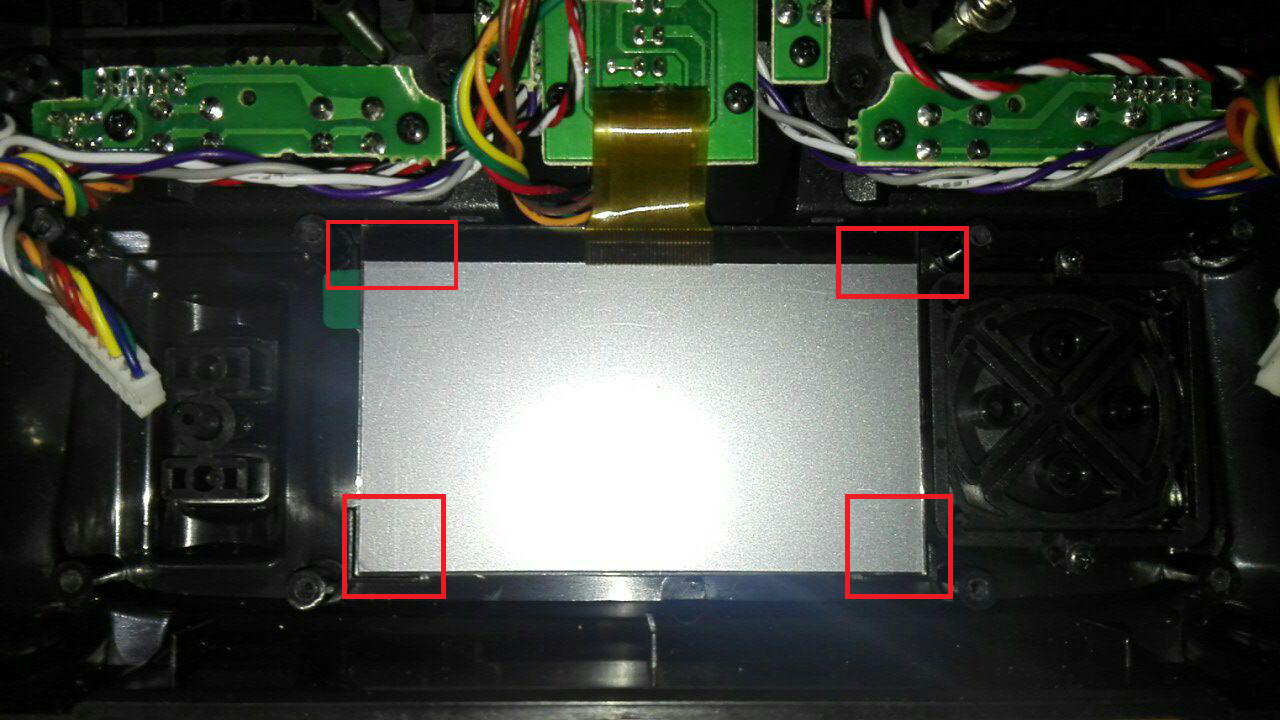
CAUTION! Be careful with flex screen and cables!
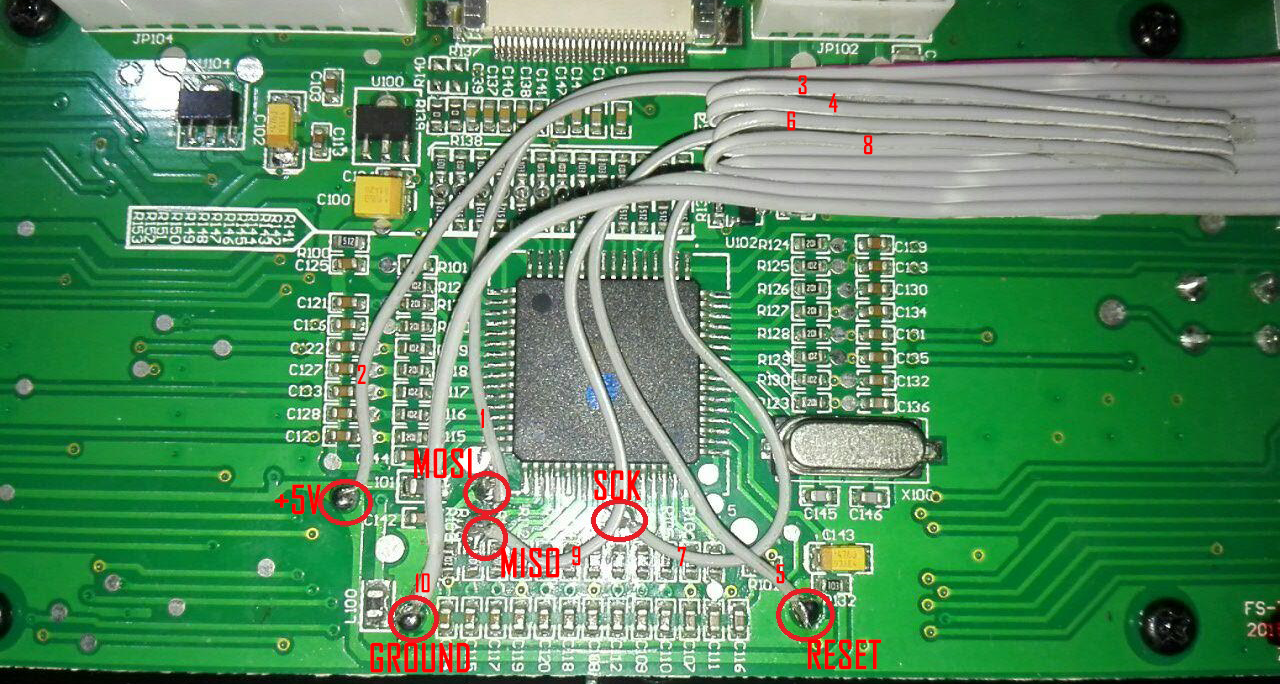
I use a AVR cable with 10 pins to connect directly the main board with USBasp. I used some flux to weld easily.

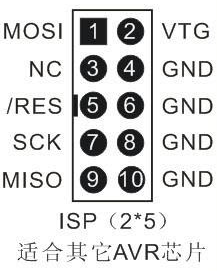
The first cable (that with red line) is the PIN ONE.
| ISP cable with 10 pins | Main board TH9x | |
|---|---|---|
| 1 | <-> | MOSI |
| 2 | <-> | +5V |
| 3 | <-> | ~ |
| 4 | <-> | ~ |
| 5 | <-> | RESET |
| 6 | <-> | ~ |
| 7 | <-> | SCK |
| 8 | <-> | ~ |
| 9 | <-> | MISO |
| 10 | <-> | GROUND |

You can use double sided tape to stick the cable and avoid desolded.
After weld it and before screw it again, verify the screen doesn't move.

Well, after complete this, you control is ready to AVRdude.
CAUTION! If you have connect any battery to main board, remove it!
I create a .zip specifically for this control, FlySky TH9x. If you download this .zip don't need install OpenTX Companion.
The firmware to flash is OpenTX 2.2 - stable release ENGLISH version.
| Windows | Linux |
|---|---|
| Download: Windows .zip | Download: Linux .zip (only .hex) |
Windows .zip contains the .hex file (OpenTX 2.2) and avrdude utility.
Linux .zip only contains the .hex file! You need install avrdude via APT, pacman, or any packages manager.
Unzip the files, and open your console (CMD) on the same directory, type: avrdude.exe
th9x-opentx avrdude.exe
...
  -?                         Display this usage.

avrdude version 5.10, URL: http://savannah.nongnu.org/projects/avrdude/
th9x-opentxIf you see the previous lines on your console, AVRdude it's correctly installed!
Now, flash the firmware...
Connect your USBasp/AVRisp to main board, and later, connect USBasp to PC.
Type on the console:
avrdude.exe -c usbasp -P USB -p m64 -b 19200 -U flash\:w\:opentx-9x-templates-audio-gvars-battgraph-pgbar-en.hex\:iCAUTION! After avrdude command, you need type ':i' DON'T forget that!
If you're using AVRisp, you need changed '-c usbasp' by '-c avrisp' and the port now in used by arduino is the same detected your system (the same on Arduino IDE). In this example is COM4 port (in linux is ttyACM0 or any other):
avrdude.exe -c avrisp -P COM4 -p m64 -b 19200 -U flash\:w\:opentx-9x-templates-audio-gvars-battgraph-pgbar-en.hex\:iOn linux it's the same way...
avrdude -c usbasp -P USB -p m64 -b 19200 -U flash\:w\:opentx-9x-templates-audio-gvars-battgraph-pgbar-en.hex\:iAfter flash is complete, the console show:
...
avrdude.exe: verifying ...
avrdude.exe: 56042 bytes of flash verified

avrdude.exe: safemode: Fuses OK

avrdude.exe done. Thank you.Now your FlySky TH9x have OpenTX 2.2!
Now disconnect your USBasp. Connect the battery to your radio and power on. Consider have a good battery level (OpenTX need some little to flash the eeprom).
First power on!
After flashing OpenTX, and on the first power on, the radio send a error code "EEPROM error" says. DON'T worry about that! Press any key and wait OpenTX repair it! After that, you radio works fine!
You don't know how to calibrate sticks? Don't worry! Check this video!
If you need access to Setup menu, or any other? The way to access is Long press the + KEY. Try with other keys (UP, -, DOWN).
You have troubles with avrdude on Windows? Download utility from official website!
ENJOY!